
Live2D physics are what make a VTuber model feel alive—but they are also the #1 cause of jitter, lag, clipping, and “jelly movement” if configured incorrectly.
Many creators assume physics settings are just sliders you push until the model looks cute. In reality, Live2D physics are a control system that directly affects performance, tracking stability, and viewer comfort.
This guide explains Live2D VTuber model physics settings in plain English, shows what each setting actually does, how to tune them correctly, and how to avoid the most common physics mistakes that ruin streams.
If you’re still learning the basics, start with vtuber model creation process before diving deep into physics.
What Are Live2D Physics (In Simple Terms)?
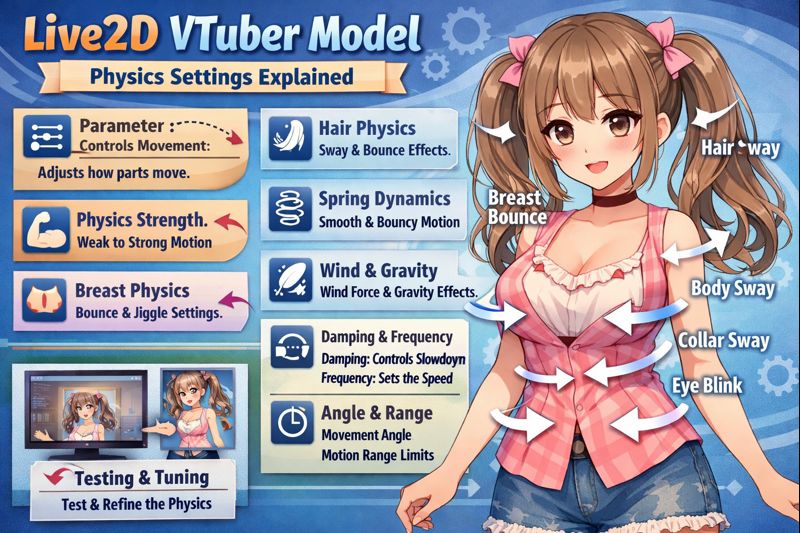
Live2D physics simulate how parts of your model react to movement and gravity.
Physics are commonly applied to:
- Hair (front, side, back)
- Accessories (ears, ribbons, earrings)
- Clothing (sleeves, jackets, collars)
- Body sway and breathing
Physics do not create motion by themselves.
They react to input parameters such as:
- Head angle (X, Y, Z)
- Body movement
- Breathing or idle motion
Poor physics settings don’t just look bad—they reduce tracking accuracy and FPS.
👉 Supporting read: live2d vtuber model optimization tips
Core Live2D Physics Settings (Explained Clearly)
1. Input Parameters (What Drives the Motion)
Inputs define what movement the physics respond to.
Common inputs:
- Angle X / Y / Z (head rotation)
- Body angle
- Breathing parameter
Optimization tip:
Limit physics inputs to what actually matters. Too many inputs cause unstable motion.
👉 Related guide: vtuber face tracking calibration guide
2. Output Parameters (What Actually Moves)
Outputs define which parts of the model move.
Typical outputs:
- Hair swing
- Clothing sway
- Accessory bounce
Each output is linked to one or more inputs.
Common mistake:
Linking one output to too many inputs → chaotic motion.
3. Physics Strength (How Much It Moves)
Strength controls how far a part moves in response to input.
- Too high → exaggerated, rubbery motion
- Too low → stiff, lifeless model
Best practice:
Use subtle motion that supports expression without distracting viewers.
4. Damping (How Fast Motion Settles)
Damping controls how quickly movement stops.
- Low damping → endless wobble
- High damping → snappy but stable motion
For streaming:
- Hair: medium–high damping
- Accessories: higher damping
- Clothing: conservative damping
Damping is the single most important stability setting.
👉 Performance-related read: vtuber low fps fix
5. Delay (Reaction Time)
Delay adds a slight lag between input and movement.
This creates a natural “follow-through” effect.
Too much delay causes:
- Sluggish response
- Desync feeling
- Viewer discomfort
Use delay sparingly.
6. Gravity & Direction (Why Things Fall the Way They Do)
Gravity defines:
- Direction (downward, sideways)
- How strongly parts are pulled
Incorrect gravity settings cause:
- Hair floating upward
- Accessories drifting unnaturally
Always match gravity direction to model orientation, not just default presets.
How Physics Affect Performance (More Than You Think)
Physics calculations run every frame.
Excessive physics cause:
- CPU spikes
- FPS drops
- Tracking lag
- OBS instability
This is why models that look fine in short tests fail during long streams.
👉 Internal link: vtuber lag when streaming obs
Professional Physics Tuning Workflow
Step 1: Start Conservative
- Low strength
- High damping
- Minimal outputs
Step 2: Test With Real Movement
- Fast head turns
- Talking loudly
- Expression changes
Step 3: Increase Only What Adds Value
If viewers don’t notice it, it probably doesn’t need physics.
Common Live2D Physics Mistakes (And Why They Happen)
❌ Over-Physics Everything
More physics ≠ better model.
❌ Copy-Pasting Physics Presets
Every model has different proportions and needs custom tuning.
❌ Testing Only While Idle
Idle tests hide problems that appear during gameplay.
❌ Ignoring OBS Load
Physics must be tested inside OBS, not only in VTube Studio.
👉 Related troubleshooting:
- vtuber obs sync issue
- vtuber stream stuttering fix
Recommended Physics Settings by Model Part
Hair
- Medium strength
- High damping
- Limited input axes
Accessories
- Low strength
- Very high damping
Clothing
- Conservative movement
- Avoid full-body physics unless needed
Create a “Lite Physics” Preset (Highly Recommended)
Professional VTubers often maintain:
- Full physics (short streams, chatting)
- Lite physics (gaming, long streams)
Lite presets dramatically improve stability.
👉 Supporting page: vtuber model setup
How Physics Interact With Tracking Quality
Bad physics amplify tracking issues.
If your tracking is unstable:
- Physics exaggerate jitter
- Mouth movement feels delayed
- Head motion looks unnatural
Fix tracking first, then physics.
👉 Internal links:
- vtuber tracking accuracy issues
- vtuber model mouth not moving
Live2D Physics Optimization Checklist
Before going live:
- ✔ Physics respond smoothly
- ✔ No endless wobble
- ✔ No clipping during fast motion
- ✔ Stable FPS for 30–60 minutes
- ✔ Lite preset tested
When to Get Professional Physics Optimization Help
Consider expert help if:
- Physics cause constant lag
- Model feels “jelly-like”
- OBS performance suffers
- You’re preparing a debut or rebrand
👉 CTA: hire vtuber setup service
Final Thoughts
Live2D physics are not decoration—they are engineering.
Well-tuned physics:
- Enhance realism
- Improve tracking feel
- Protect performance
- Keep viewers comfortable
Bad physics do the opposite.
By understanding and correctly tuning your Live2D VTuber model physics settings, you turn motion into an asset—not a liability.
Recommended next reads:
- live2d vtuber model mistakes
- live2d vtuber model optimization tips
- vtuber model cost full pricing guide